How To Remove Black Mold From Grout?
Tips To Remove Black Mold From Grout
Black mold on grout can be removed with a few easy steps. First, wear gloves and a mask to keep safe. Then, mix a little bleach with water. Use a brush to scrub the grout with the mixture. This helps to kill the mold and make the grout look clean. After scrubbing, let the area sit for about ten minutes so the bleach can work well; then rinse the area with clean water.
If you still see black mold, repeat the steps until it is gone. You can also use a mixture of baking soda and water. Apply the paste to the grout and let it sit for a while. Scrub gently and rinse off with water. Keeping the area dry and clean helps to stop the mold from coming back. Following these simple tips will make your grout look clean and free of black mold.
Discovering the Problem
What I Found on My Tiles
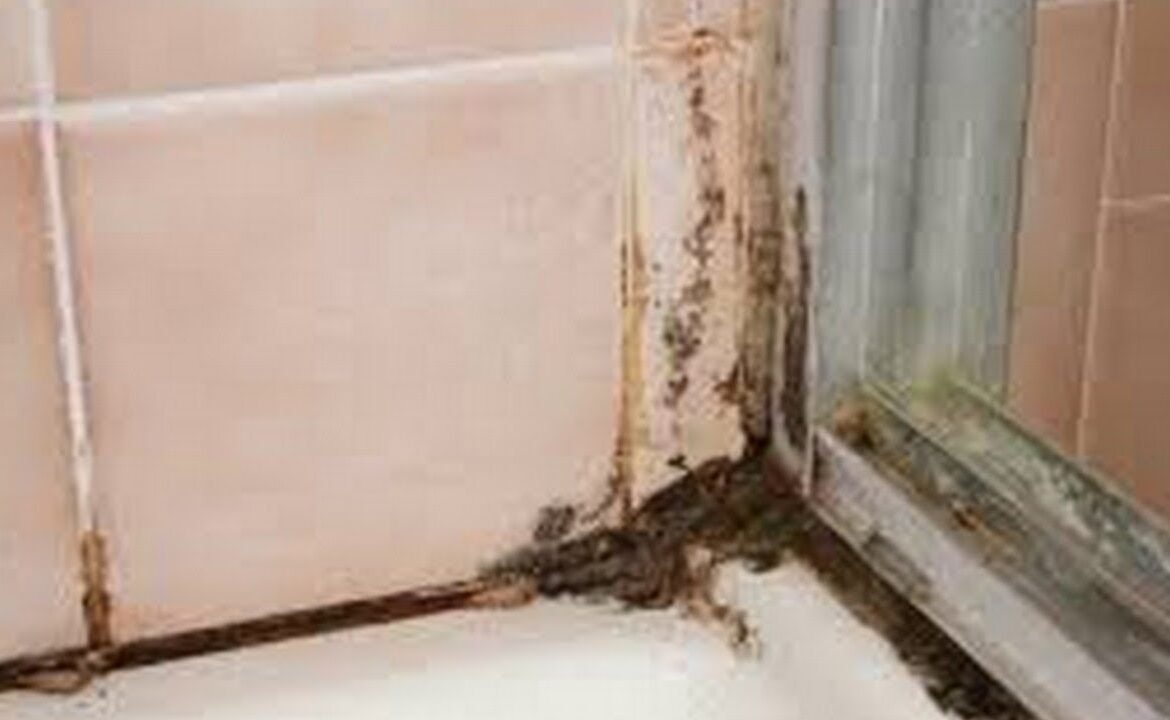
One morning, when I was brushing my teeth, I noticed dark black spots on the grout between my bathroom tiles. At first, I thought it might be dirt or a spill, but as I looked closer, I realized it was black mold. I felt a wave of worry. I had learned in school that mold can make people sick if it is not cleaned up properly. The mold on my grout made me feel uneasy, and I knew I needed to do something right away.
The Worry And Fright
Every time I looked at my bathroom, the black mold spots reminded me that something was wrong. I started to worry about how this mold might affect my health and the health of my family. I was afraid that the black mold could spread to other parts of the house. I tried cleaning the grout on my own with water and soap, but the black mold just would not go away. I felt helpless and scared because I did not know how to stop it from coming back.
The Arrival Of The Experts
A Professional Team
On the day of the appointment, a team of friendly experts arrived at my home. They wore uniforms and special protective gear, like masks and gloves, to make sure they would not spread the mold to other areas. I was very impressed by how professional they looked and how carefully they talked about each step of the process.
A Detailed Inspection
The first thing the experts did was a thorough inspection of my bathroom. They examined the grout on every tile, not where I had seen the visible black mold. They used special tools to check the air and the surfaces for any hidden mold spores. Their detailed inspection helped me understand that the black mold on my grout was part of a larger issue that needed proper treatment. They explained each step to me in simple words, so I knew exactly what was happening.
The Step-By-Step Mold Removal Process
Step 1: Preparing The Area
Before starting the mold removal process, the experts prepared the area very carefully. They moved some of my bathroom mats and covered the floor with protective sheets. This was done to keep the mold from spreading to other parts of the house and to protect my belongings. They also opened a window to let fresh air into the room. I learned that proper preparation is very important because it helps make the cleaning process more effective and safe.
Step 2: Using Special Cleaning Tools
The experts then began cleaning the grout where the black mold was present. They used special cleaning tools and brushes designed to scrub away mold from the tiny spaces between the tiles. I watched as they carefully worked on each tile, making sure that they did not miss any spots. Their tools were different from the ones I had at home, and I was amazed by how much more effective they looked.
Step 3: Applying The Cleaning Solution
After scrubbing the grout, the team applied a powerful cleaning solution to the area. They explained that the solution would help break down the mold and prevent it from growing back. The cleaning solution was mixed with safe ingredients that would not harm my family or pets. I was especially interested to hear that this solution was part of what made the mold remediation services so effective. The experts used spray bottles and small brushes to apply the solution evenly across the grout lines.
Step 4: Waiting For The Solution To Work
Once the cleaning solution was applied, the experts told me that it needed some time to work its magic. They advised me to wait about 30 minutes before doing any further cleaning. During this time, the solution was breaking down the mold and preparing the grout for a final cleaning. I spent the waiting time reading a book and feeling hopeful that the black mold would soon be gone for good.
Step 5: A Second Round Of Cleaning
After waiting, the experts returned to the bathroom to give the grout a second, more thorough cleaning. They used another round of scrubbing with special tools to remove any remaining mold. I could see that the grout was becoming much cleaner and that the black spots were fading away. The team was very careful to make sure that every inch of the grout was treated properly. This step was very important because it ensured that the mold would not come back later.
Step 6: Final Inspection And Advice
Once the cleaning was finished, the experts did a final inspection of my bathroom. They checked the grout, the tiles, and even the air in the room to make sure that the black mold was completely gone. I was very relieved when they told me that my bathroom looked clean and safe again. Before leaving, they gave me some useful advice on how to keep the mold from coming back. They explained that keeping the area dry, using a dehumidifier, and cleaning the grout regularly are key to preventing mold growth.
Special Tools And Products Used By The Experts
The Power Of Professional Tools
One of the things that impressed me the most was the special tools the experts used. These mold cleaning services Indiana used advanced tools, unlike the simple brushes and mops I had at home. These tools could reach deep into the tiny spaces between the tiles. These tools helped them scrub away the mold more effectively and quickly. I learned that professional tools are designed for tough jobs and that they can make a huge difference in cleaning power.
The Role Of Special Cleaning Products
Also, for the special tools, the experts used powerful cleaning products that were safe and effective. They explained that these products are made to break down the mold at a chemical level, making it easier to remove. I found it interesting that these cleaning products played a big role in the success of the mold remediation services. Experts noted that chlorine dioxide products help remove mold and stop it from returning.
Learning About Chlorine Dioxide Products
The experts explained that chlorine dioxide products break down mold molecules. This means the mold is not only hidden but also removed from the surface. I was surprised to see how quickly the solution worked on the grout. Chlorine dioxide products are strong for mold removal. Many professionals use them because they clean deeply and safely. I felt confident knowing that these products were part of the cleaning process, as they have been trusted by many people to fight mold.
My Recommended Services For Mold Remediation
My journey to remove black mold from the grout was not an easy one, but it was a very important lesson in keeping my home safe and clean. I was very worried because of the black mold on my grout, but my friend told me about mold remediation Indiana services. These experts used their unique tools and strong cleaners to remove the mold.
Before I wrap up this review, I want to highlight one last key point: these experts use chlorine dioxide products. These products are very well known for their strong ability to remove mold. They work by breaking down the mold at a chemical level, ensuring that it does not grow back. This makes them a vital part of the mold removal process and a reason why I now feel so confident in the safety of my home.